Showing posts with label upcycle. Show all posts

Wednesday, December 8, 2010

Upcycled Toddler T-Shirt Dress

I was introduced to a FABULOUS toddler t-shirt dress a few weeks ago, and I couldn't get the tutorial out of my head. Cheri put it together from I Am Momma Hear Me Roar. You can find the tutorial here.

This is my version:

Cheri actually handpainted some of the t-shirt material that she used. I knew I had some fun old shirts that I hadn't worn in a while, so I grabbed them and got started. I made two dresses in under two hours, using a turtleneck as the top for one and a long-sleeve t-shirt top for the other. The strips all came from the same shirts.

When I finished the dress for my daughter (the other is for a friend's daughter) I asked her to model it for me. From the start the shoot was not going well. My model was being camera shy:


Here you can at least see how the dress falls:


My model was getting delirious at this point. I think its funny that it looks like her tights match her sheet.


Awww . . . this is better!


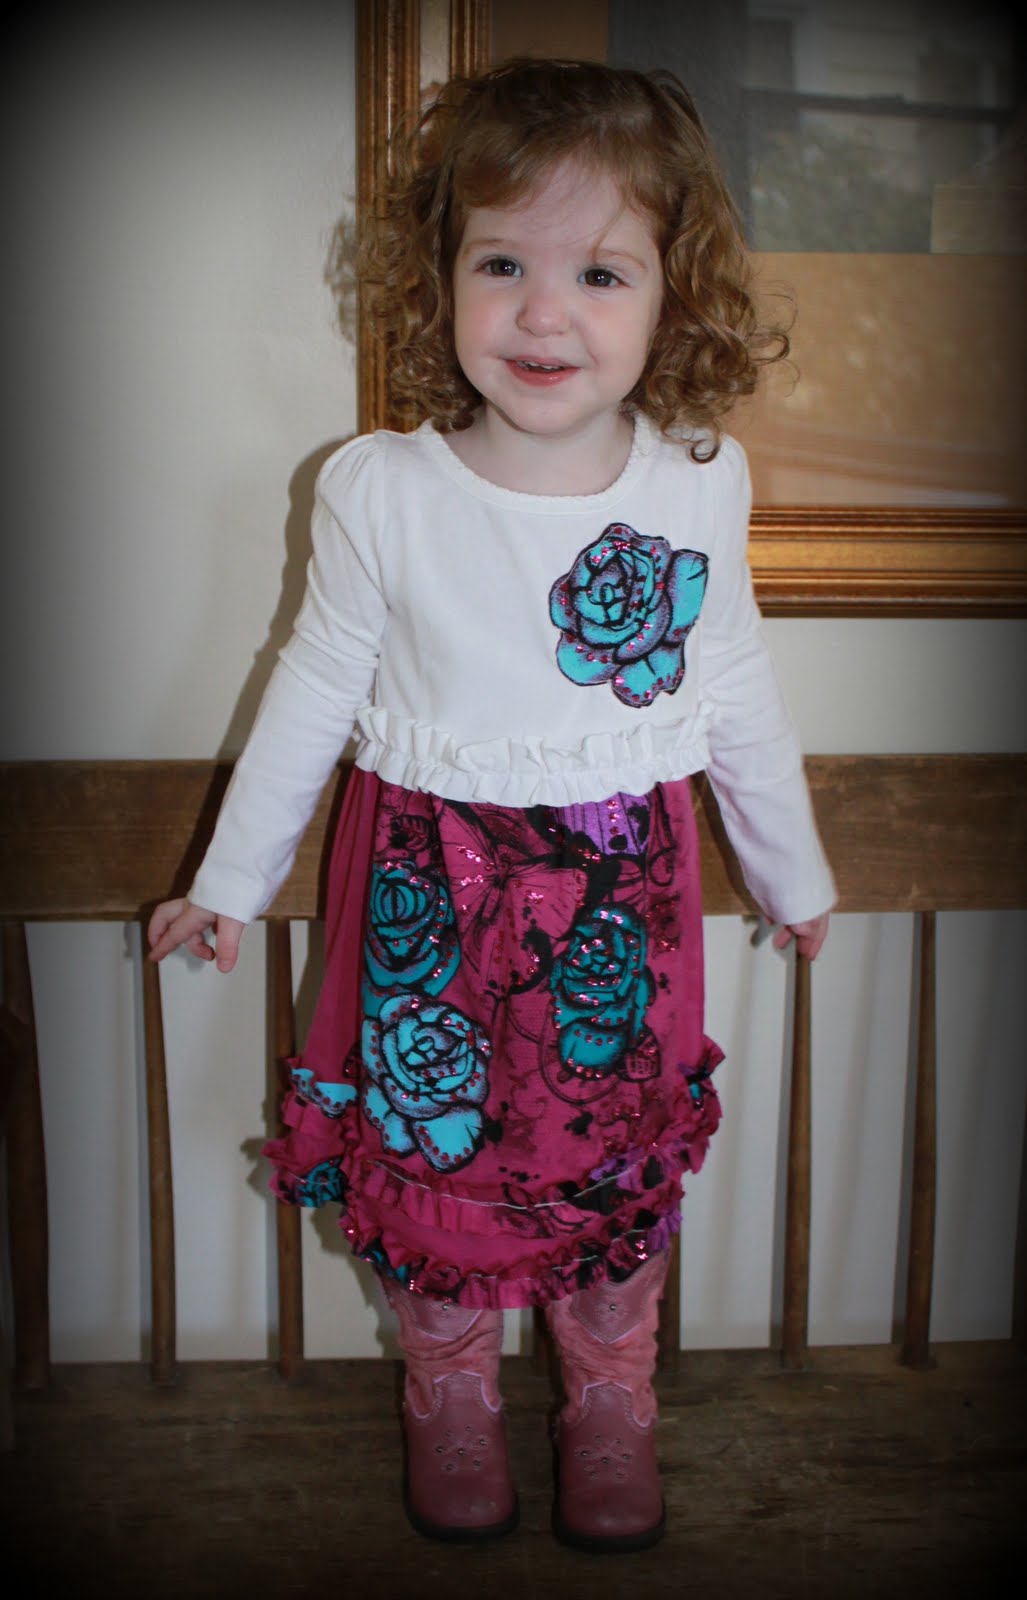
Here is the finished dress. In Cheri's tutorial she sews the strips wrong sides together to have the horizontal seams show. I did this on the first dress, but sort of forgot on Ella's.


I showed the dress to my husband and he said he recognized the strips in the dress right away! Notice that the last strip is actually from the bottom of a shirt so that you don't have to hem the dress!


Here is the one I made for my little friend Mary Larkin, complete with the now-famous ruffle pin that her mother made:


Here is a close-up of the shirt fabrics, which came from:

Target
Old Navy
Marshalls
Old Navy


And isn't the twirly turtleneck so sweet with the ruffle pin?


Thanks for the great tutorial Cheri! I will definitely be making more of these in the future. To see my other two upcycled dresses, visit these links:

Ruffle Dress / Tunic Tutorial

Upcycled T-shirt to Toddler Dress Tutorial

This post can be found at the following link parties:


Show and Tell Green


Tuesday, October 26, 2010

Another Fun Toddler Tunic Dress Made from T-Shirts


I just loved the dress I made last week for my friend Flannery's daughter, so I knew I wanted to make one for Ella. The dress from last week cost $24.00; the toddler long-sleeved t-shirt was $8 and the two women's purple t-shirts were also $8 each. I took a ride over to Target to browse the huge clearance racks they have set up, to see if I could find something funky and fun and even cheaper to work with.

I bought the same long-sleeved white t-shirt to start with, but then in the girl's section I found these great little t-shirts with embellishments--blue and lavender roses with black pen and ink type vine illustration and tons of sparkles. In my mind I started to cobble together a funky, Ed Hardy-inspired dress, and I think I really hit the mark! Paired with purple leggings and her trademark pink cowboy boots, I think Ella loves her new dress!


Oh, and the pink t-shirts were on clearance for $3.98! So my total for this dress was $15.96! (And I made it in under an hour!!!) Talk about instant gratification!

If you'd like the tutorial I posted for this dress last week, click here. The only difference is that instead of a ruffle around the neck, I put one around the waist, and I also cut out one of the roses and appliqued it on the top of the dress.

If you try my tutorial, let me know, and please e-mail me photos of your one-of-a-kind creation!

This post is a part of the following link parties:


Thursday, October 7, 2010

A Little Bit of Love Sewn into An Upcycled Quilt for My Boy

In the previous post I showed you that I was upcycling some of James' old t-shirts for a new project. Well, it turned into a little lap quilt! So far he has played a caped superhero with it, made a tent with it, and snuggled in his bed with it.

He loves it. And I love that he loves it. (sigh)

Please visit the following link parties for more crafty inspiration!


Monday, September 27, 2010

Flowering Vine Applique T-Shirt Tutorial

Hi! If you are visiting from One Pretty Thing's Daily DIY, WELCOME and please be sure to follow me if you like my blog, and leave me a comment to let you know who you are and a link back to your blog so that I can visit!

I have been wanting to make an appliqued t-shirt of my own since I have been doing so many kid versions. Target has these fabulous v-neck pocket tees that I love--they fit me well, they layer with my Yummie Tummie well, and they come in great colors. Here is the finished shirt:


Hmm? That dust on my mirror? I'm just keeping it real, folks. LOL

So to begin, pick a shirt.

Next, pick a contrasting fabric to use. Looking back at my finished shirt, I am thinking that it would look great with the flowering vine in an Amy Butler fabric. This was my first one, so to practice, I used some old pillowcase material that I have scraps of.


Next I went to istockphoto.com and searched out "flowering vine illustration" to give me some artwork from which to base my design on. Here is one that I found that I liked. You don't have to pay for it, just do a print screen and then you can blow it up on your printer if you need to.


I am decent at freehanding, so I just applied my Heat n' Bond to one side of the pillowcase material, and then drew elements of the design onto the fabric to be cut out.


First I started by laying out the vine pieces. You can see that I have that pesky pocket to deal with. I guess I could have ripped it out with my seam ripper, but I was worried about creating a great big hole.


Here's a neat trick--once I got the layout I liked, I just rolled up the shirt and took it to my ironing board to then iron the pieces to the shirt. (My board isn't wide enough for me to be able to lay it out the way I would like, so I use my dining room table.)


Here is is ironed:


Next I started to choose thread colors. I knew I wanted to use two colors, to give it an interesting look.

Then it was time to begin laying out the leaves and flowers.


Sewing the flowers was a little rough, but I like the sort of grungy, messy look. It made the whole project feel very free-spirited and not tight.


I also had these sort of bud-like flowers:


And here is a close up of two contrasting leaves:


And here is the finished shirt again, with a Yummie Tummie and leggings!

This project took me a few days--I really needed to pay attention as I was turning the shirt this way and that under the sewing foot constantly. Now I think I should look at a free motion quilting foot--some of that technique would lend itself well to a project like this!

Thanks for visiting, and be sure to check out these fabulous Monday Link Parties!

The Girl Creative


The DIY Show Off


Making
mmm button


BWS tips button

Photobucket


Show and Tell Green

NightOwlCrafting