Showing posts with label toddler. Show all posts

Tuesday, October 26, 2010

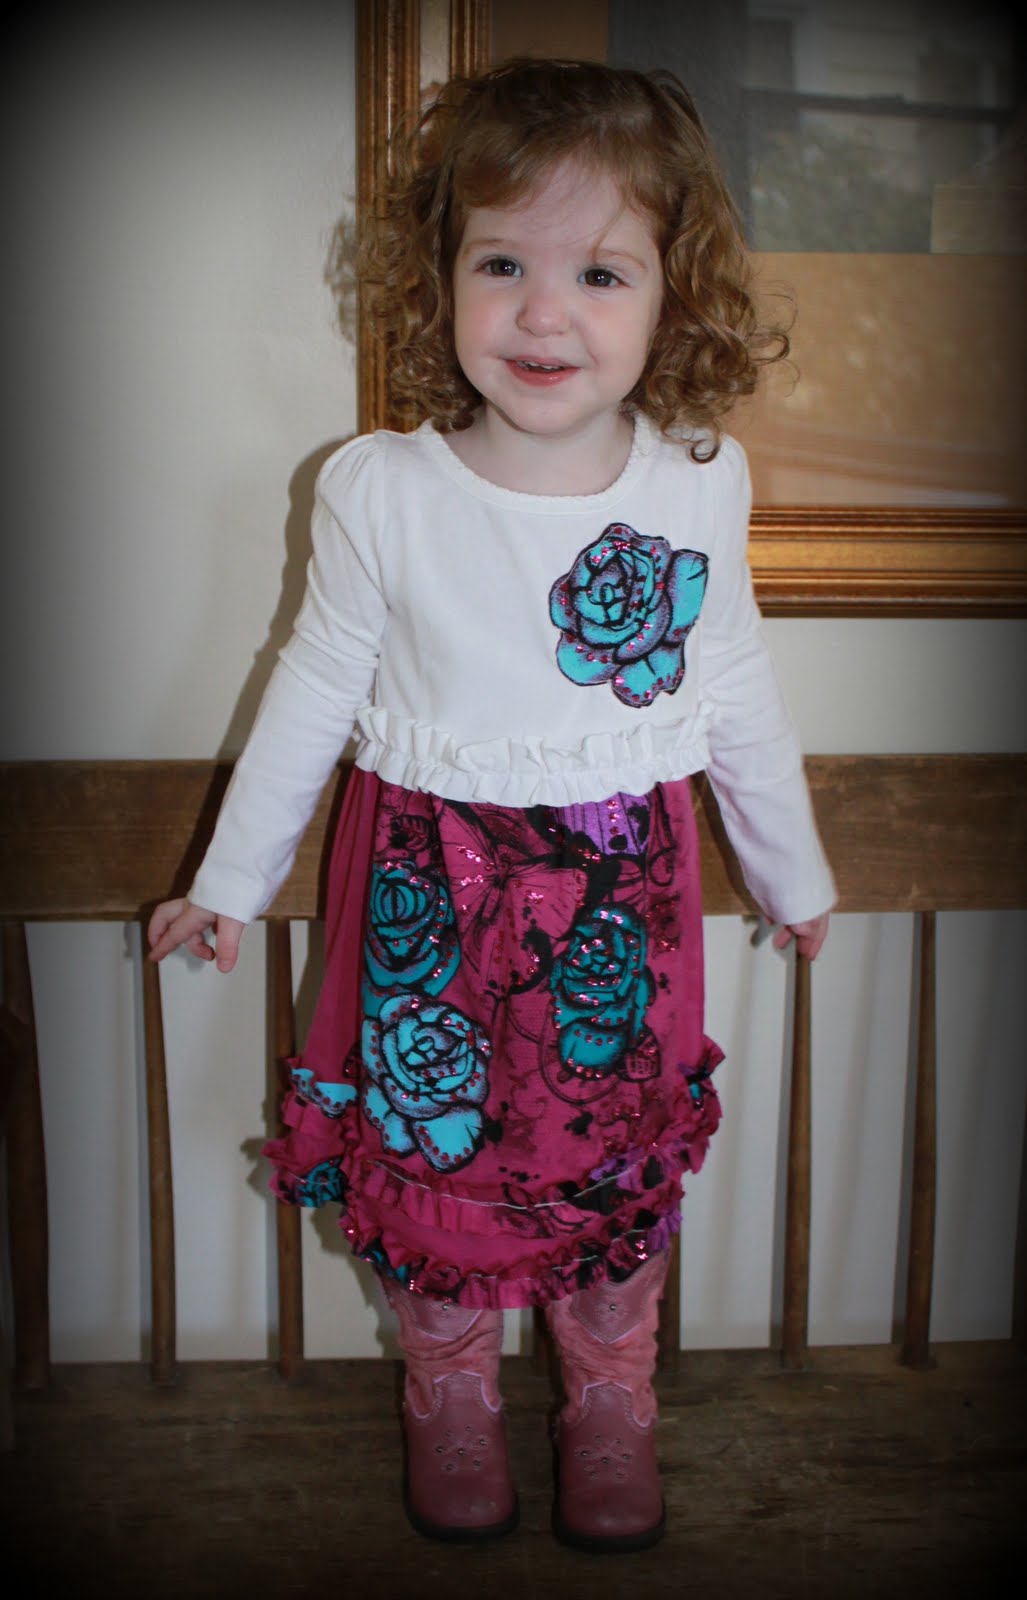
Another Fun Toddler Tunic Dress Made from T-Shirts


I just loved the dress I made last week for my friend Flannery's daughter, so I knew I wanted to make one for Ella. The dress from last week cost $24.00; the toddler long-sleeved t-shirt was $8 and the two women's purple t-shirts were also $8 each. I took a ride over to Target to browse the huge clearance racks they have set up, to see if I could find something funky and fun and even cheaper to work with.

I bought the same long-sleeved white t-shirt to start with, but then in the girl's section I found these great little t-shirts with embellishments--blue and lavender roses with black pen and ink type vine illustration and tons of sparkles. In my mind I started to cobble together a funky, Ed Hardy-inspired dress, and I think I really hit the mark! Paired with purple leggings and her trademark pink cowboy boots, I think Ella loves her new dress!


Oh, and the pink t-shirts were on clearance for $3.98! So my total for this dress was $15.96! (And I made it in under an hour!!!) Talk about instant gratification!

If you'd like the tutorial I posted for this dress last week, click here. The only difference is that instead of a ruffle around the neck, I put one around the waist, and I also cut out one of the roses and appliqued it on the top of the dress.

If you try my tutorial, let me know, and please e-mail me photos of your one-of-a-kind creation!

This post is a part of the following link parties:


Tuesday, August 24, 2010

Toddler Ruffle Skirt from Upcycled T-Shirt

This sweet little project took less than one hour to complete!


I made the skirt from a beloved Old Navy long-sleeved tee that had a hole in it (but was still in my closet for some reason).


Isn't it precious on Ella, paired with the little white peasant blouse?


Here it is with a plain white tee.


And a close up of the imperfectly-sewn but still perfectly adorable ruffles.


You can find the tutorial here. Thanks Sew Much Ado! I can cross off one of the tutes to try in August from my list!

This post can also be found at:

BWS tips button

Photobucket


Make it Yours @ My Backyard Eden

NightOwlCrafting


Funky Junk's Saturday Nite Special


Happy Tuesday!

Monday, August 16, 2010

Custom Solar System Wall Art from Upcycled 80s Curtain Panel

Today's tutorial is for custom wall art. This is a great idea for literally whipping up an inexpensive and personalized piece of art, customized to your exact taste.

My boy is obsessed with all things space right now. I painted two small pictures for his room a few months ago, but he still has a large open space over his headboard that needed something special.


For this piece of artwork I chose to use a curtain panel from the 80s with the solar system on it.


I found this lovely piece of polyester at the Fort Andross Fleamarket, located inside Cabot Mill in Brunswick, ME. Every time we go back to Maine to visit my Dad we stop in there. Dad has a space at the adjacent Cabot Mill Antiques. We start there, and then wander over into the flea market.


The fabric caught my eye hanging in a seller's stall. I was drawn to the graphic and the brilliant color. Initially my hope was to somehow transform the panel into trim for James' dark blue curtain panels, but there wasn't enough fabric.

For this project you simply need scissors, a staple gun, your fabric and a canvas the size you want for the piece. This canvas is 22" x 28". I found it at Michael's crafts for $20 and it was 50% off. NICE!


Here's the boy, ready to help. (And TOTALLY ecstatic.)


First I laid the fabric right-side down on the table. I tried to find a place in the pattern where I could get nearly all of the solar system included in the piece. Then I trimmed all around the canvas, leaving a few inches with which to stretch the fabric over the frame.


Next I just stretched and stapled, starting at the center of each side and working my way outward.


When it came time for the corners, I just folded the fabric as if I was wrapping a present.


And then I stapled.


Tah-dahh!!!


One very happy boy! (Must wait for husband to come home to put nail in finicky old plaster wall.)


Such an easy project! I have seen similar pieces done with Amy Butler fabric. There are a million applications for this--in nurseries, in classrooms, over a master bed, maybe rooster fabric in a kitchen--anything!

Have fun!

BTW one of my new ruffled t shirts was just featured!

Making

I am linked up with the following Monday parties:

The Girl Creative

MarketingMondays


Saturday, August 14, 2010

Ruffle Toddler Dress from Upcycled Tshirt Tutorial--Revisit

I am excited to tell you that I have been asked to submit my Toddler Ruffle Dress from an Upcycled Tshirt Tutorial for the following fun challenge!


The deadline for entries is tomorrow--I am sending mine in as soon as I have finished this post!

I received great feedback and comments from the tutorial, and a friend sent me this photo of the dress that she and her Mom made as a result of my tutorial:


Don't you just love it when someone follows your tutorial and sends you pics and the result is fantastic? Thanks Carey!

On a side note, I have been soaking labels off of a variety of jars in preparation for the flower arrangements for Ella's birthday party. 8 days and counting before the big Lemonade and Sunshine Birthday Social! (Are you sick of me talking about it yet?)

Have a happy weekend!

Wednesday, August 11, 2010

Toddler Ruffle Dress from Upcycled T-shirt

Hold your horses folks--I am about to present you with my VERY FIRST sewing tutorial! I have been absolutely crazed with the ruffle shirt tutorials over at Tea Rose Home, (see my recent attempt here) and so I started poking around looking for a toddler dress tutorial which I found at Happy Together. My dress is a combination of both.

For those of you that know me, you know I am NOT great with a sewing machine. I am NOT organized, I am NOT patient, I do NOT use patterns,--basically the way I sew is haphazard, frenzied with excitement and usually with James or Ella (or both) running around. So, my point is that if I can do this, YOU CAN DO THIS!

Start with a tee shirt. I went through my closet this morning and found an old, OLD long-sleeved tee from Old Navy that I used to wear when I was pregnant with James.


I'm not sure why I still have it, as it has a HUGE grease stain on it, but I am sure glad that I hung on to it!


As is instructed by the tutorial over at Happy Together, I found a dress that Ella currently is wearing that I really like the cut of. I folded the tee shirt in half vertically, and then did the same with the dress, which I placed on top of the tee shirt and then cut around it with scissor. See? NO PATTERN!


Then I cut up the side seams on the tee shirt and placed right sides together, pinning them so that I could stitch up the sides (leaving the armholes open) and across the shoulders.


After I finished stitching the two sides together I turned it inside out. Don;t worry about stitching the hem, as you will be covering it with a ruffle. Notice in later photos that when I cut the shape of the dress out, I centered what will be the dress' neckline over the v-neck of the tee. That way there is a more finished look on the dress. Not necessary, but so helpful for someone like me.

Next I cut open the arms of the tee shirt.


I trimmed them with my rotary cutter into a rough rectangle (notice I say "rough" there is blissfully nothing exact about this pattern.) Then I cut two pieces about three inches wide and one piece about 2" wide. I did the same on the other arm.


Now for the ruffle. sew all four of your two-inch pieces together, to form a nice long strip. Next, change your machine settings so that you are using a wide straight stitch. (If this ruffle part makes no sense, I will not be offended if you need to jump over here or over here for a better explanation of how to do it.)

Sew down the middle of your strip. DO NOT BACK STITCH at the beginning and the end.

When you are done, take one end and gently pull the bobbin thread (this is when it is handy to use two different thread colors) or else just try each thread until you find out that when you pull it you make a ruffle. I have also found that if you put your tension way up, on 8, the ruffle can actually make itself. (Hard to visualize, you'll just have to try it.)


THIS is the step that is time consuming, almost frustrating, as it can take some time to get the ruffle to look just right.

VOILA! Ruffle!


Next pin the ruffle around the bottom edge of the dress. Tee shirt material can be a little wonky, so make sure that you aren't pulling or stretching either the dress or the ruffle as you go along.


Next, sew RIGHT DOWN THE MIDDLE of the ruffle, all the way around. Some people do this step twice, but not me, as I said, I am a haphazard, let be what will be, it may all come out in the wash (fingers crossed that it doesn't) kind of seamstress.


Now make a ruffle out of each of the 1 1/2" pieces for each armhole. Pin them around (start and end at the armpit) and sew again.


Ta-DAAAH!!! I was so excited at this point that I was jumping around the room, shoving the dress at Ella and James and yelling "LOOK WHAT MOMMY MADE!!!"


You could be done at this point, but I was going ALL OUT and felt like I was on top of the sewing world, so I got a little crazy and wanted to add an embellishment. I had made one of the flowers in the Tea Rose Home tutorial and it just about did me in, so I went for what I thought might be an easier approach--the rose in the Happy Together tutorial.

I sacrificed an old tee shirt of James' that is too small for him.


From the back I cut a large oval-ish piece and then began to cut a 1/4" (sort of) piece from all the way around it.


Next I pinned it to the shirt and started winding around it loosely.


Next I stitched it in my typical lackadaisical fashion. Not great, but that is why I like the shabby part of shabby chic. (Wink, wink).


I added a vintage purple button to the center of the rose and that was it! (For the life of me I can't get this photo oriented vertically, so just bend your head to the right and you'll see the dress properly.) HA HA.


My Ella in her brandy-new upcycled tee-shirt dress!! (Seriously, I could stitch some paper bags together, throw them on her and she would look great.) Who can even look at what she is wearing when her smile is co crazy-cute??!!


I hope you try my tutorial! And if you make this dress, please leave me a comment and let me know how it turned out!

This post is part of several link parties, so go and visit them and get inspired for your next project!



Show and Tell Green


NightOwlCrafting


XOXO